> For the complete documentation index, see [llms.txt](https://stellarabbitstudio.gitbook.io/stellarabbitstudio/llms.txt). Markdown versions of documentation pages are available by appending `.md` to page URLs; this page is available as [Markdown](https://stellarabbitstudio.gitbook.io/stellarabbitstudio/tmp-vfx-shader/quickstart.md).
# Quickstart
Quick Learn About TMP VFX Shader
:tada: Thank you for purchasing the TMP VFX asset!
* Before using TMP VFX, please check :warning: [Requirements](/stellarabbitstudio/tmp-vfx-shader/requirements.md).
* Having problems? Check the Error Fix Tool below.
{% content-ref url="/pages/sbfnVsKxSQGYIm1cAL1e" %}
[Error Fix Tool](/stellarabbitstudio/tmp-vfx-shader/error-fix-tool.md)
{% endcontent-ref %}
## Quick Setup
1. Add a **TextMeshPro** component to your GameObject (UI or World Space)
2. Change the shader to **"TextMeshPro/TMP VFX"** in the material settings
3. Add the **GlitchOnce.cs** script to your TMP gameObject
## Detailed Setup
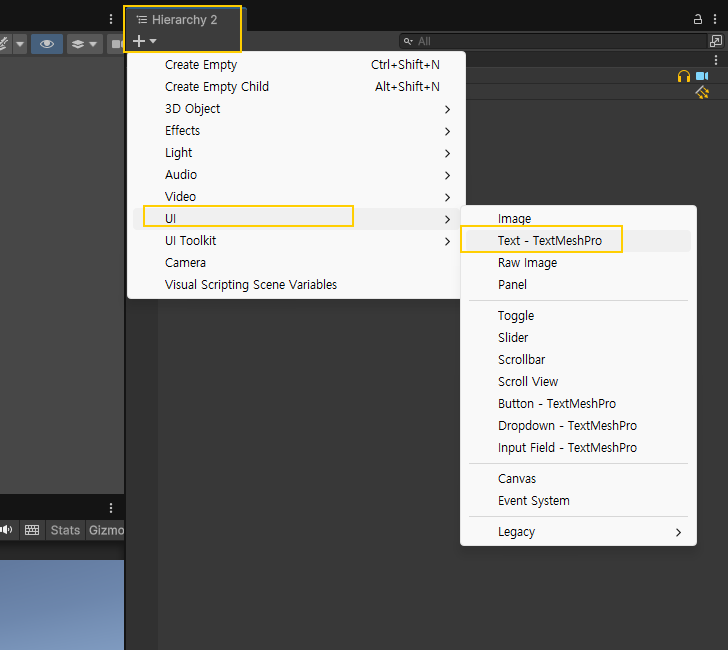
#### 1. Right-click in the Hierarchy window to create a Text - TextMeshPro
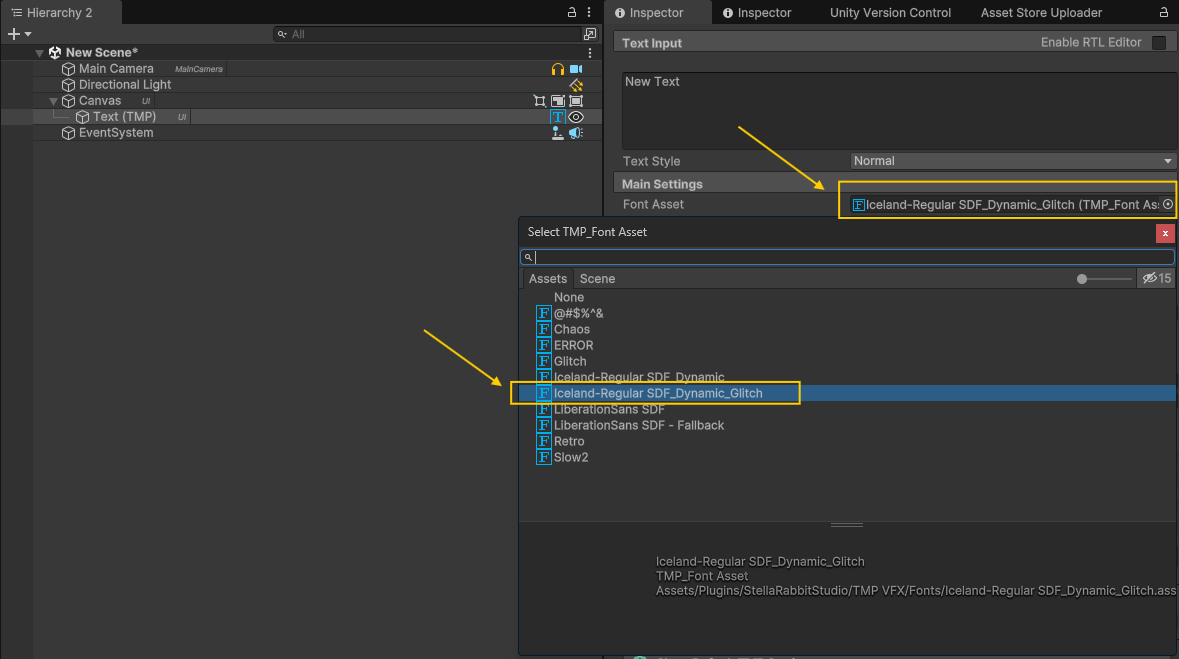
2. Set the **Font Asset** to **Iceland-Regular SDF\_Dynamic\_Glitch**
If you want to create a custom **Font Asset** that can apply effects, check out the guide below.
{% content-ref url="/pages/FcZ1RfRnF6TBxn5tqARP" %}
[Font Asset](/stellarabbitstudio/tmp-vfx-shader/font-asset.md)
{% endcontent-ref %}
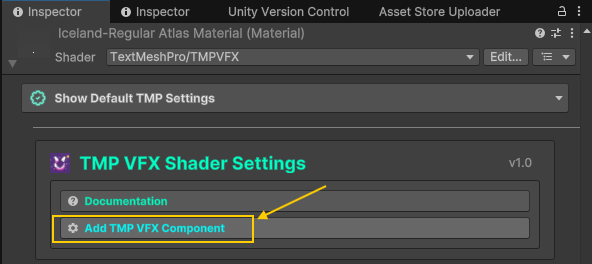
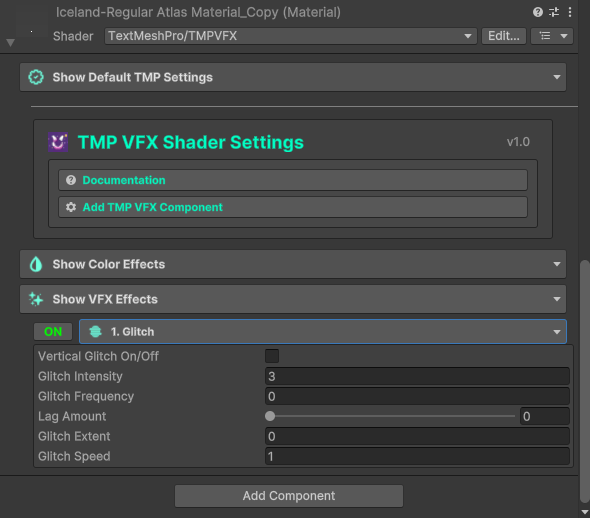
3. Scroll down in the Inspector, then click the **Add TMP VFX Component** button under **TMP VFX Shader Settings**.
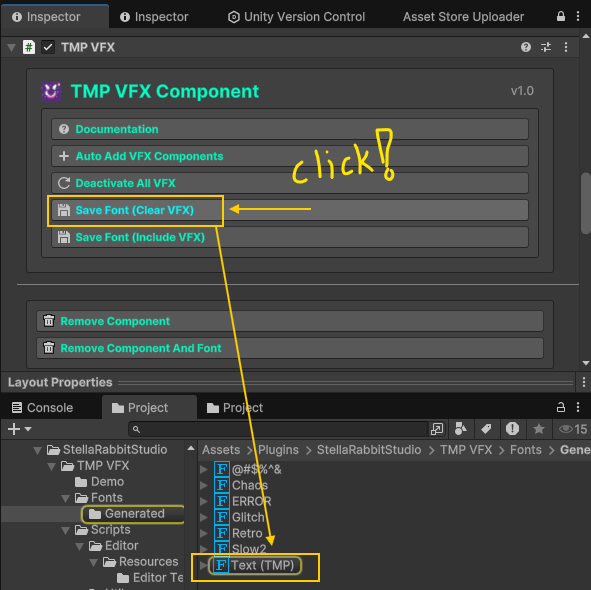
4. Scroll back up to locate the **TMP VFX Component**, then click the **Save Font (Clear VFX)** button.
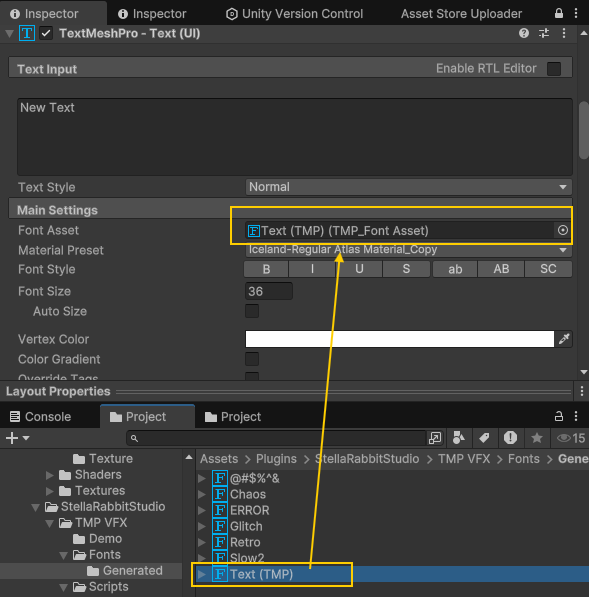
5. Assign the created **Font Asset** to the **Font Asset** field in **TextMeshPro**
The setup is now complete. Keep reading to learn how to apply effects.
## How to apply VFX
Scroll down to the **Material Shader Settings** section of the font
You will find the **TMP VFX Shader Settings** tab.
In that tab, click **Show VFX Effects**, then enable the **Glitch** effect by turning it **ON**
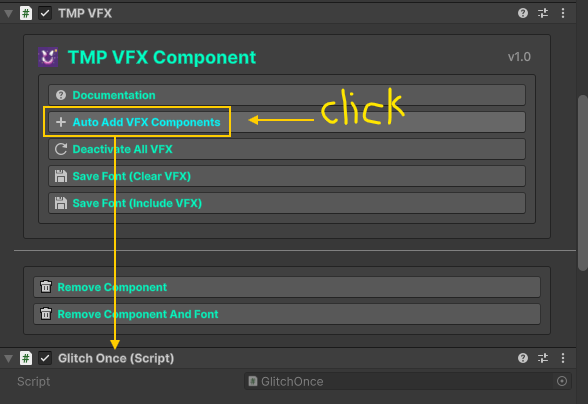
Scroll back up and click the **Auto Add VFX Components** button in the **TMP VFX**** Component** tab.
Everything is ready! :tada:
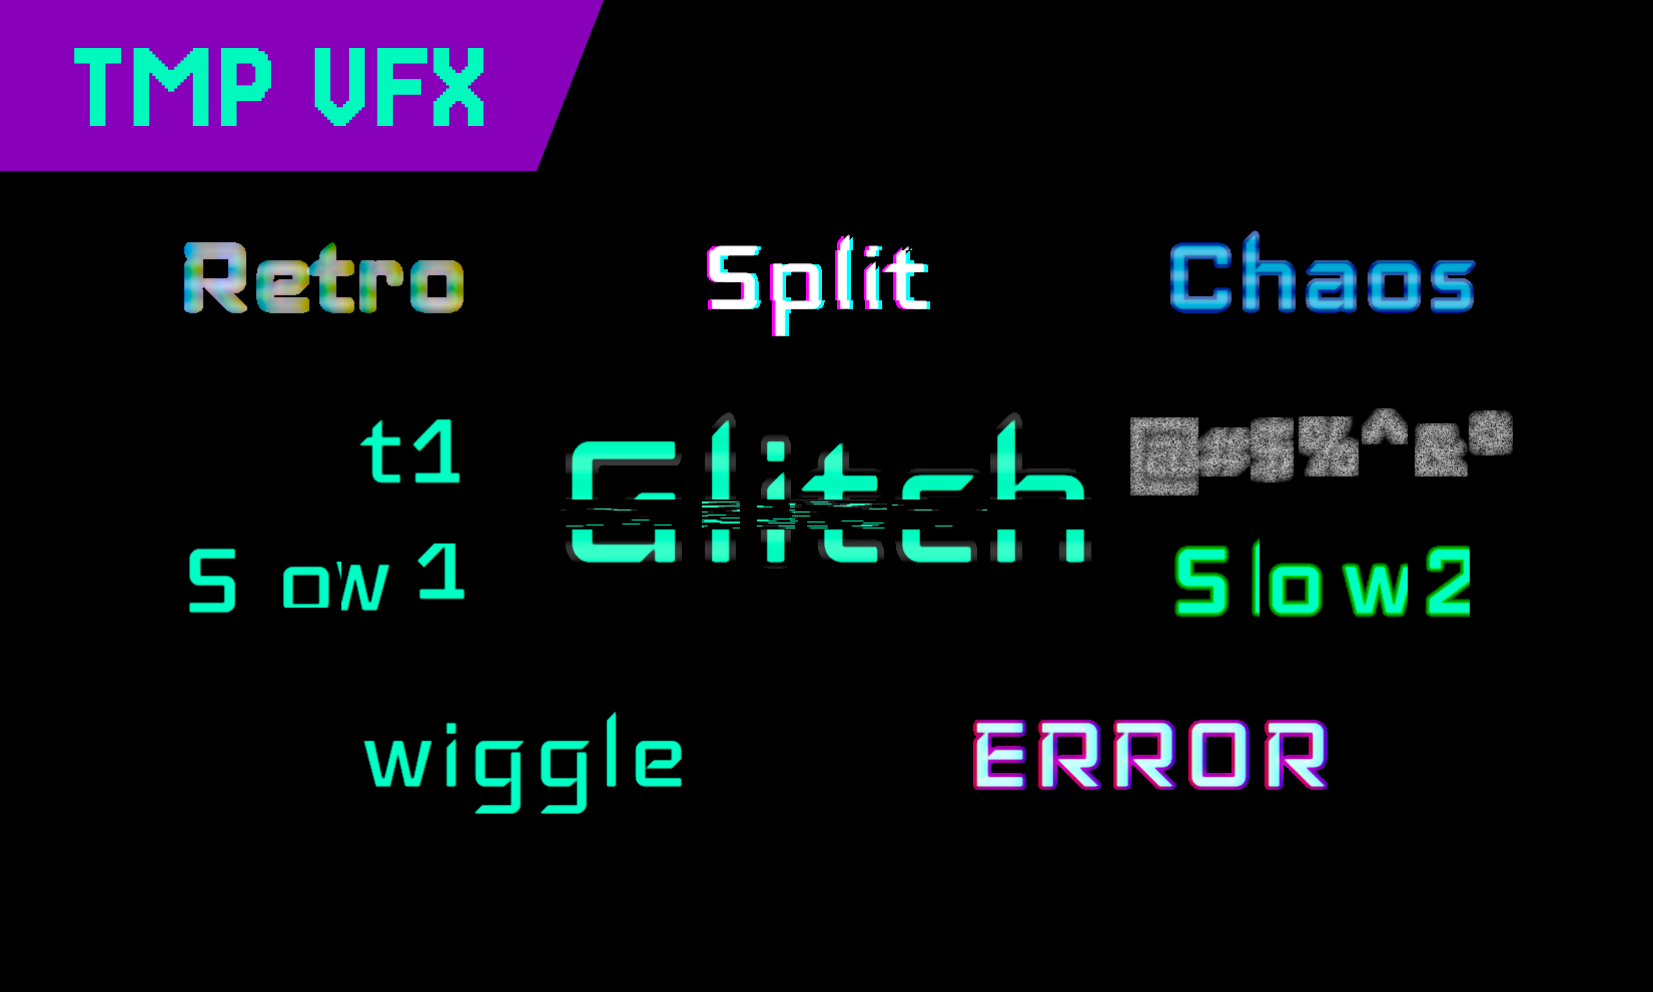
When you play, you should see the text with the applied effects.
For details on additional settings you can customize, please refer to the guide below.
{% content-ref url="/spaces/Hn6DmkxXXtfi3gPxzMFr/pages/qCzSlc9tQjxuNcb0wJOa" %}
[Glitch VFX](/stellarabbitstudio/tmp-vfx-shader/shader-settings/glitch-vfx.md)
{% endcontent-ref %}
Additional Features
* Outline customization
* Glow effects
* Underlay options
## Support
For additional support or questions:
* Join our [Discord ](https://discord.gg/mnHRQ4HutJ)community for direct support
*